**This post is now out of date- if you want to see how to do it with the new version of Raspian Buster, or with a Raspberry Pi 4, go to this link
My son has a habit of asking what’s on about 15 times day, and if that weren’t bad enough, he often comes into my office and uses my work computer to look at the calendar. Something had to be done.
I’ve seen a lot of digital signage projects (and ‘magic mirror’ projects) on Reddit so I started planning. A Raspberry Pi would easily display the data, and I wondered if I could get a display with a built in USB port to make the wiring neat.
It turns out you can, as long as you’re prepared to settle for a Raspberry Pi Zero W. It’s a $14 (yes you read that correctly) single board computer that will run off a 500mA USB port.
At that point the project became all about getting it to run on this ridiculously cheap board…….. but it wasn’t smooth sailing.
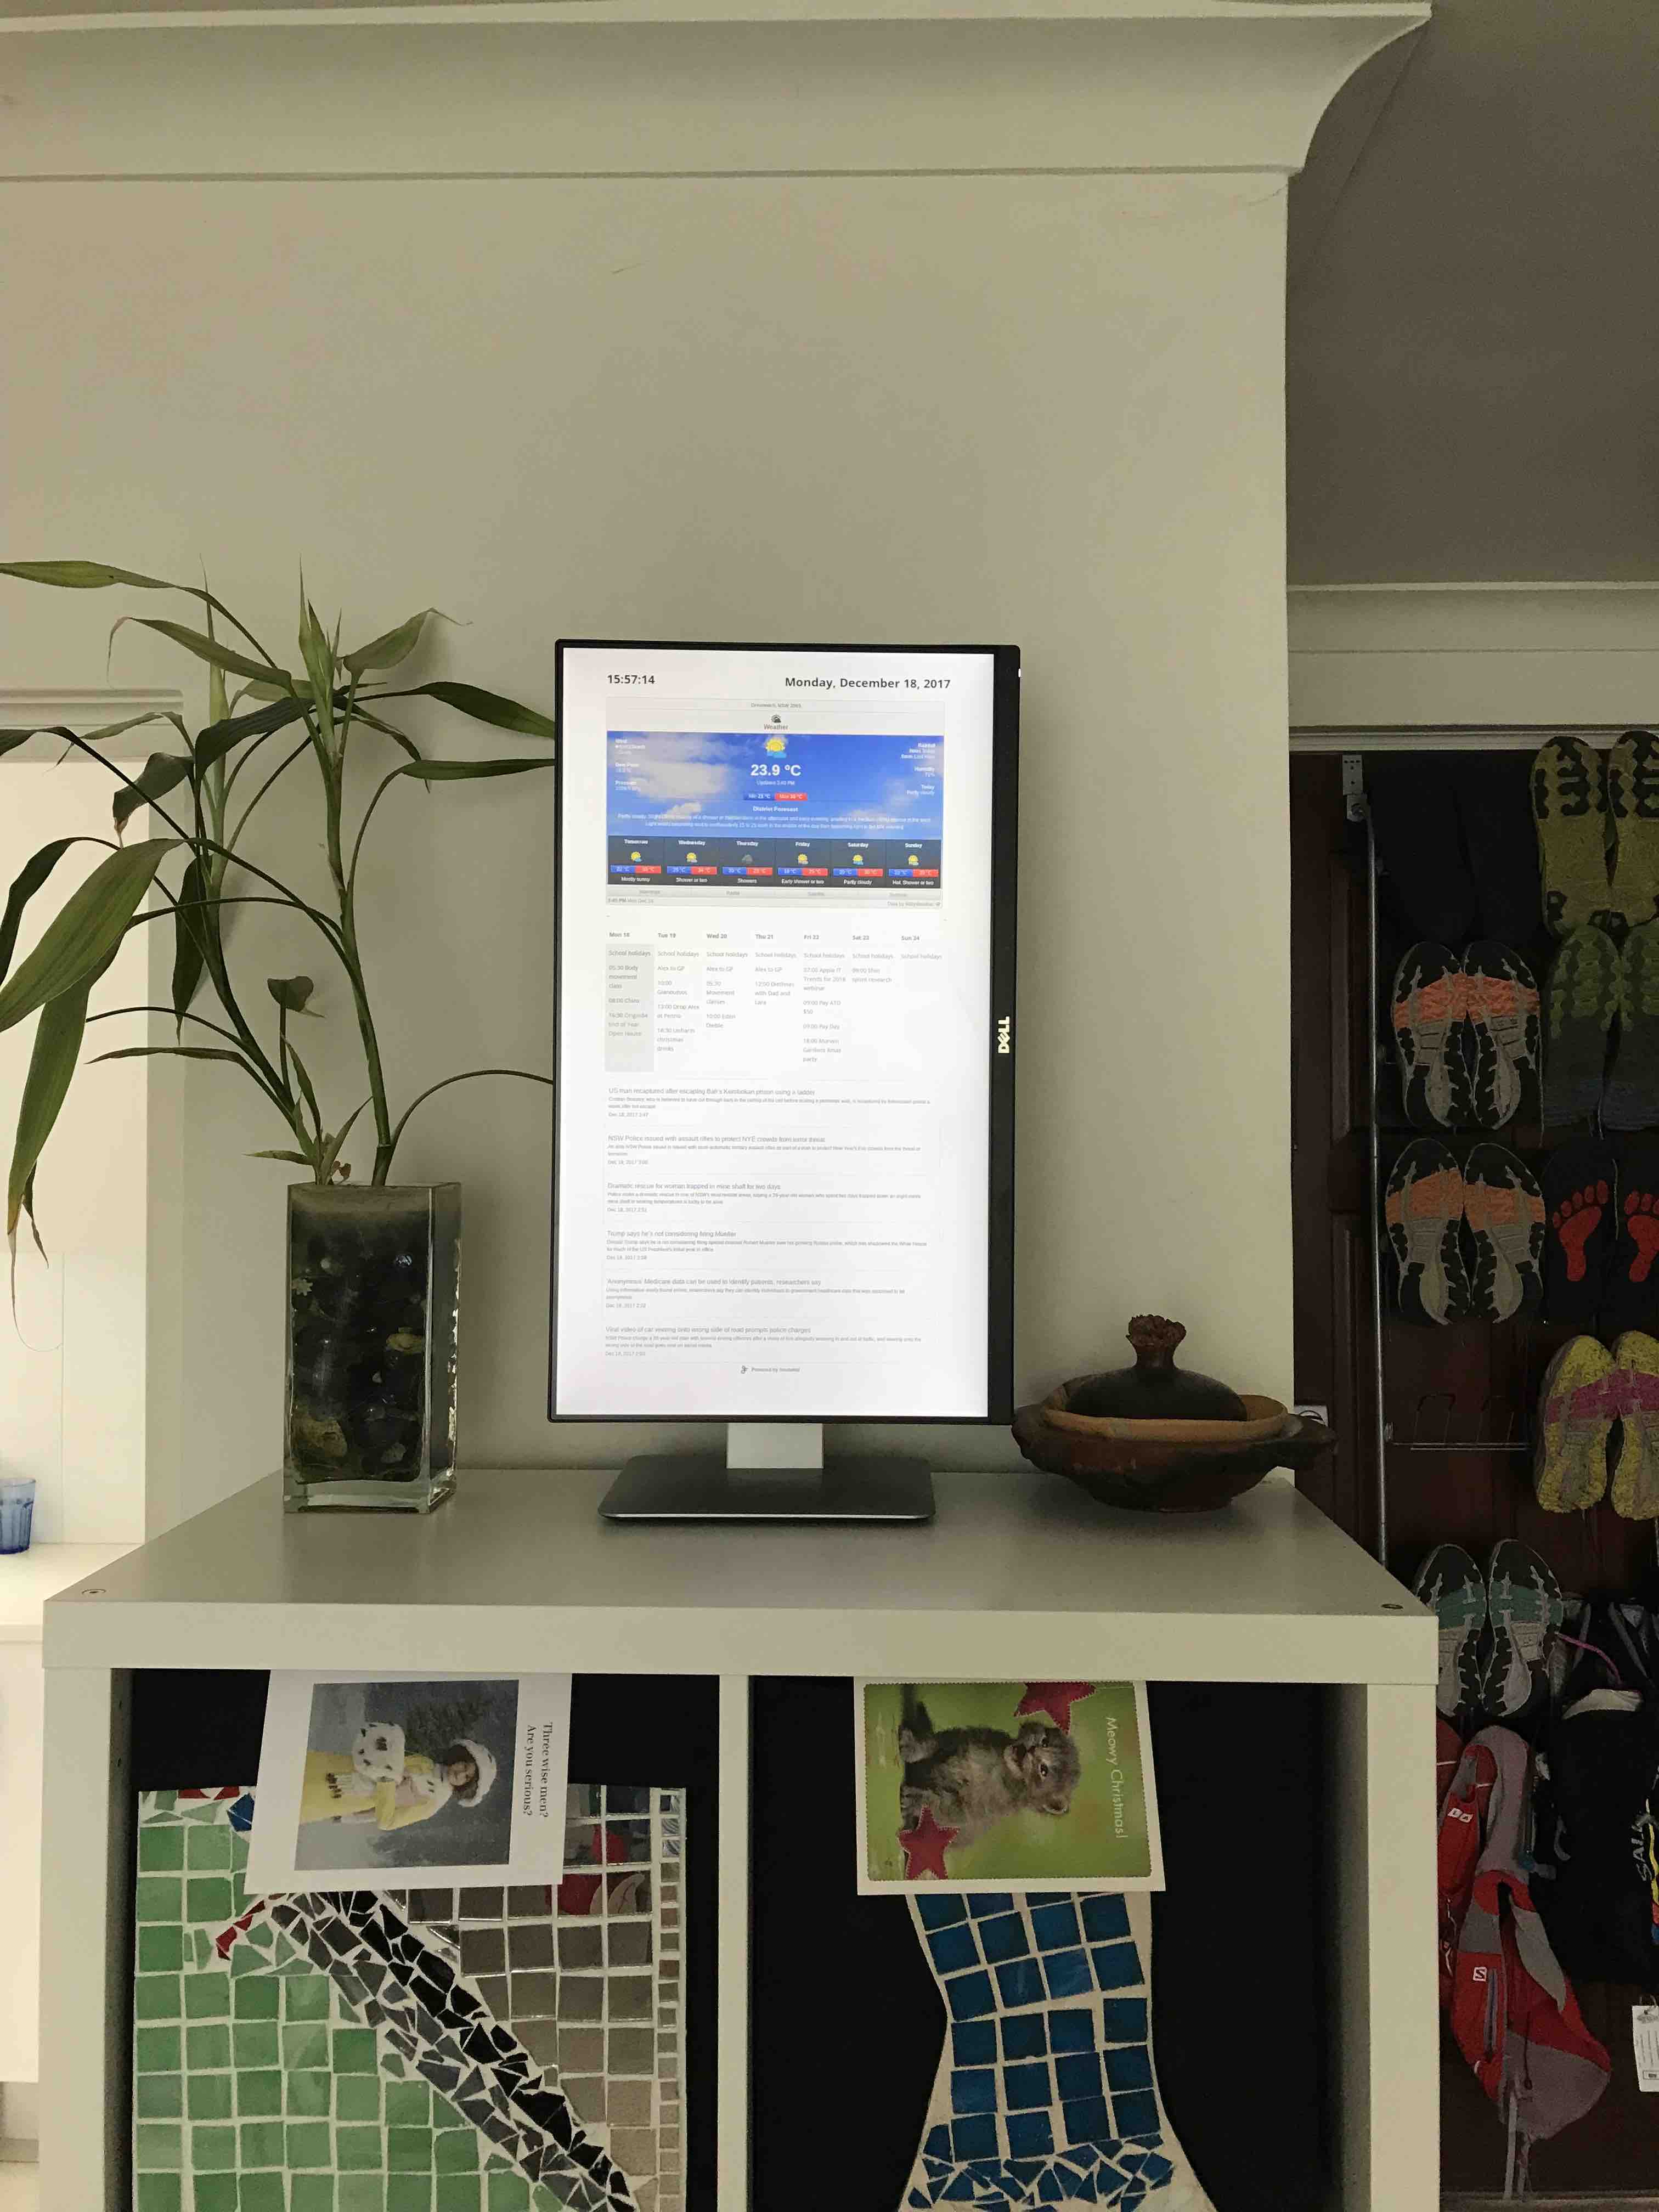
I purchased a Dell U2414Hb monitor that includes a USB charging port. It seems to supply 1A of power, so it’s perfect for this job. But they are expensive- getting a cheaper monitor and using a $25 power supply would have been smarter. It really is a beautiful looking display though. Will be even better if I can cover the Dell logo! And it’s a little sick to be using a display that cost 15x the computer that is attached….
So we had the hardware done. How to do the software part? I know very little about coding, so I figured that a private WordPress site would be good for this job. It’s a sledgehammer to kill an ant, but should be easy.
Look at that word again. ‘Should’ be easy. Oh, you have no idea……
I have a couple of Synology DS1817+ NAS units so I tried to install WordPress on one. Apparently you should read dialog boxes carefully because I stuffed it up the first time and that took a couple of extra days to work out- you have to auth the Synology to the MariaDB database to get it installed and I’d used the wrong creds…..
Anyhooo, I finally got WP installed and running. The next decision to cause grief was to use the Divi theme from Elegant Themes so I can learn it for another project. It’s pretty complex, but at least it seemed to have all of the features I needed.
It will be a simple page that uses plugins for all of the resources, I wanted to have the following on the display
Current date and time
Weather forecast for the local area
Calendar showing all family events
Scrolling news feed
Web Help Desk data
– that last one is for my main help desk app. I like to know how many current help desk tickets I have vs how many are unanswered. This would be good for a glance to see how busy my day was going to be. (Please note this info is not currently on the display- too complex for my toy mind right now).
Many of these features will be delivered by ‘Widgets’ but I need flexibility in where to put them- normally widgets can only been placed in certain areas on a page. I needed a plugin called ‘AMR Shortcode any Widget’ which allowed me to modify widget settings without worrying about where the code was going.
Current Date & Time
Well, this is a complete shitfight. There’s heaps of timer plugins for WordPress, but most of them are countdown or count up timers. I did find one that I loved called ‘Flipclock’ but the animations ran too slowly on the PiZero. Eventually I settled for one called Easy Timer which is madly configurable and works really well. Very impressed.
Weather
Holy crap there’s a lot of weather widgets. And most of them are complete garbage. After trying and assessing dozens I settled on ‘Willy Weather’ which is Australian, configurable, has local weather and is totally awesome
News Feed
Again there are hundreds of RSS widgets available, and I went through loads of them to find what I wanted. I actually ended up with a customised feed from Feedwind, and it show a scrolling bunch of news stories from abc.net.au although I did have to turn off the thumbnail images as this was making my poor $14 computer cry when trying to animate the stories moving up the page.
Once I got WordPress installed on my NAS, I’d love to say that everything was smooth from there, but as you can see there was a lot of things needed to be done and it took weeks.
My next issue was with the Divi them itself- To remove the sidebar you need to use a layout called ‘full width’, and to remove the header and footer you need to use ‘blank page’ which is exactly what I want, simply a blank page to display a bunch of data. But it has a bug- it also displays the title of the page which takes up space I wanted to use for information. Turns out this is a bug in the theme, so I had to modify the CSS to get my blank page.
Calendar
This was probably the most difficult thing to get working. We needed to display the contents of 5 different calendars, make it easy to read, updated frequently etc.
First of all I started looking through the widgets and trying a few and became increasingly frustrated. Because you can’t directly show an Apple iCloud based calendar on a web page. Don’t call it iCal anymore either, it’s now called Calendar…..
I had a brief (who am I kidding, this took DAYS) sojourn looking at Gmail, G-Suite or whatever it is called these days, because what you CAN do is share an iCloud based calendar with Goggle, then use the embed feature to place this on your web page. That worked great, until I needed to share someone else’s calendar as well…… Bugger.
In the end, I used a plug in called AMR-ICAL-EVENTS which is a free WordPress plugin and very configurable. I’m very impressed. Less impressive is that I had tried it early in my search but ditched it because the documentation is so poor……
Now the webpage is done, we need to set up the Pi…..
Display Portrait Mode
Setting portrait mode on the screen was pretty simple and just required editing config.txt. We also disabled overscan to make the image fit better
Overscan can be set with the GUI, but to rotate the display you need to
Sudo nano /boot/config.txt
and add a line that says
display_rotate=1
then save and exit
I edited the amount of GPU RAM to see if I could optimise the screen redraw, this made things much worse. The device has 512mb of RAM, which kind of sucks.
Prevent Display Sleep
The first thing you need to do is prevent sleep- well the Pi doesn’t really sleep, but you need to prevent the display from going to sleep. Strangely, this is done by installing a screensaver, then setting it to never activate, instructions here-
(if you think it isn’t working, reboot the device- mine blanked the screen despite the screensaver being turned off until I rebooted)
Set WiFi Sleep to Never
The WiFi will also sleep if you let it, turn it off using these instructions at the command line-
sudo iw dev wlan0 set power_save off
from
https://raspberrypi.stackexchange.com/questions/4773/raspberry-pi-sleep-mode-how-to-avoid
Setting the On/ Off/ Reboot Schedule
I installed a GUI for Cron called ‘scheduled tasks’ with
sudo apt-get install gnome-schedule
and set up a schedule to reboot the device once per day- I chose 6:30am so I could set display sleep on at 10pm, and have the device reboot at 6am and not worry about turning off display sleep. This works fine
setting the display turn on time using answer from here
https://raspberrypi.stackexchange.com/questions/52042/turning-tvservice-on-and-off-leaves-screen-blank
a better reference is here, may last longer-
https://www.elinux.org/RPI_vcgencmd_usage
I set up 2 cron jobs- one at 10pm
vcgencmd display_power 0
and one for
9am to test if the reboot resets this screen option, this means that if the device reboots at 7am and the screen doesn’t come back on I can set the cron job
vcgencmd display_power 1
to come on at 7:10am
using this script should help-
https://gist.github.com/simlun/1b27b14d707abbba8fc1
it still doesn’t turn the display off and on- but it did when I fixed the permissions of the script file…… (update, I’m pretty sure you don’t need this script, just the cron jobs)
But when the device sent the display to sleep, it wouldn’t wake!
I eventually determined that at sleep time, the Pi notified the display it was going to sleep, and the display was helpfully killing USB power which is why it wouldn’t come back on.
I went into the control for the Dell display and set USB power to stay on, and this worked fine.
^This needs to be cleaned up- sorry I don’t know if some of these do or don’t work because it was actually a setting on the display that finally allowed me to make it work after trying all these things…..
Hide The Cursor
install unclutter to hide the cursor, and set the ‘hide’ time to something reasonable like 2 seconds, so when you’re working on the machine it isn’t trying to hide the cursor while you are working
sudo apt-get install unclutter
Refresh Webpage Content
and to refresh the sign every 20 minutes, set
meta http-equiv=”refresh” content=”1200″
which didn’t work, but adding the url to the end of the command did- this is added to the WordPress page to enforce updates…..
Full Screen Mode
Lastly we want the Pi to boot up, open Chromium, go to our web page and be in full screen mode. editing autostart to add kiosk mode etc works, but won’t give you kiosk mode unless you add the URL to the config file which is here
~/.config/lxsession/LXDE-pi/autostart
Instructions originally from here-
https://github.com/basdegroot/raspberry-pi-kiosk
Text looks like this-
@chromium-browser --noerrdialogs --kiosk --incognito http://www.domain.com/to/kiosk/page
You can actually add the text above to the Autostart file by just copying and pasting it after you’ve navigated to the correct folder…..
So after all that you might think the page is pretty complex, but no- this is the whole thing….. the beauty is in the configuration of the individual widgets……
<HEAD>
<META HTTP-EQUIV="refresh" CONTENT="1200; URL=http://xxx.xxx.xxx.xxx/wordpress/itsasign">
</HEAD>
<h1 style="float: left;"><strong>[clock format=hms]</strong></h1>
<h1 style="float: right;"><strong>[weekday], [month] [monthday], [year]</strong></h1>
[do_widget id=ww_widget-4]
[do_widget id=text-4]
[do_widget id=text-3]
Summary- I’m very pleased about how this turned out, hopefully if you are on the same journey this might save you some of the drama that I went through…… you can see in the pic that it is quite bright- in reality it isn’t bad. I have the display set to 40% brightness to prolong it’s life, prevent burn in and blend in a bit better without bending people.
*Update 24 February 2018-
I have set up a new WordPress page and used a ‘proper’ Raspberry Pi 3 to run the sign. This has enabled me to bring back the animated clock, and thumbnail images on the RSS feed. The sign looks a lot more attractive now, I just hope I don’t get into trouble for wasting all those extra CPU cycles…..