[et_pb_section fb_built=”1″ _builder_version=”3.22″][et_pb_row _builder_version=”3.25″][et_pb_column type=”4_4″ _builder_version=”3.25″ custom_padding=”|||” custom_padding__hover=”|||”][et_pb_text _builder_version=”3.27.4″]
(There’s a newer version of this post that overcomes many of these issues and works with Pi-Hole 5.0 here-)
https://servicemax.com.au/tips/pi-hole-in-docker-on-synology-the-best-way/
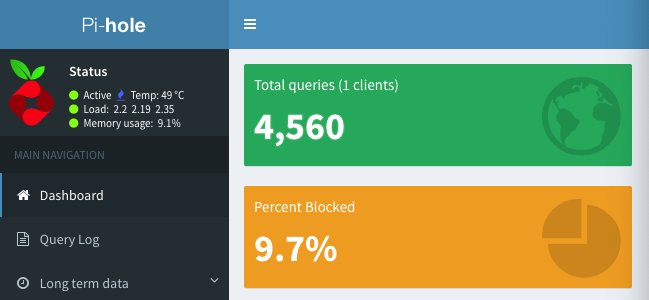
Here is the simplest way to get Pi-Hole v4.2.2 working in Docker on a Synology unit. I made the mistake of trying to upgrade from v3 to v4 and blew up my install. Working on it for weeks between jobs, it was getting more and more complicated until I was dealing with Docker-Compose.yml files, MACVLAN inside Docker, Portainer and other stuff. It was becoming ridiculously complicated for something that is so simple on a real Raspberry Pi (try it, it’s REAL simple).
So last night I figured I was making things way too complicated, and figured it out (that’s me admitting to being dumb, not a declaration of some newly discovered secret). There is a few limitations–
1. When you do it this way, your Synology is using port 80 to redirect to port 5000, so you can’t use port 80. You can turn the redirect off, but not in the GUI, and I’m trying to make it simple. So I chose another port (8181 just like the last install) and use that as the admin interface port. Apparently this means that you don’t get placeholders for your ads, and you don’t get notified when a website is blocked- it just dies. But my last install was set up like this so I don’t know the difference. You can also get around this by using some spiffy DNAT rules but again I wanted to make this usable by someone with less time than me.
2. Another limitation is that this method disables the DHCP service- I don’t need it because my Ubiquiti gear does a great job with DHCP.
3. Also the Pi-Hole thinks that it only has 1 client, so you don’t get to split traffic by client, but my Ubiquity gear does this so I don’t care.
Kids, one of the reasons your are seeing this writeup is because during the research for v4, I found my original article had been quoted by someone on Reddit and it rates pretty highly on Google when searching the topic. That doesn’t exactly make me an expert, but it does make me want to help more and gives me that warm, runny feeling.
sooo, the install
1. Install Docker
2. Go to the Registry, type in ‘Pi-Hole’ and download the official image, (v4.2.2 or later)
3. Click ‘Advanced Settings’ and set ‘Enable Auto Restart’
4. Set the port forwards according to the pic- leave port 67 as ‘auto’ as it won’t be used, but set port 53 UDP and TCP to port 53 local, and your container port 80 is set to 8181 local. You’ll also notice that i’ve set the SSL port to be 8182, that was more for convenience – I’m going to work further on this and SSL definitely has a role.
[/et_pb_text][et_pb_image src=”https://servicemax.com.au/wp-content/uploads/2019/04/Screen-Shot-2019-04-02-at-10.03.11-am.png” align_tablet=”center” align_phone=”” align_last_edited=”on|desktop” _builder_version=”3.23″][/et_pb_image][/et_pb_column][/et_pb_row][et_pb_row _builder_version=”3.25″][et_pb_column type=”4_4″ _builder_version=”3.25″ custom_padding=”|||” custom_padding__hover=”|||”][et_pb_text _builder_version=”3.27.4″]
But it works because it appears to use the DNS server that your Synology NAS is currently set to. It downloads the block lists, sets itself up and is as happy as a happy DNS server can be.
Your next steps are-
5. Go to the logs at Docker/Container/ Pi-Hole/ Details/ Log and scroll around to find the password
6. Log on to http://Synology-ip-address:8181/admin/ using your password
7. Manually set the DNS addresses that setup conveniently ignored
– this is in Pi-Hole/ Settings/ DNS/ Upstream DNS Servers
– In my case I’m using custom servers so Netflix can’t restrict my viewing- with Getflix DNS
8. Log on to your router and set your new Pi-Hole to be the DNS target for DHCP clients
– This will usually be in your DHCP setup- you’re telling your router to give the Pi-Hole address to all of your clients to use for DNS lookups
– Optionally you can also set a rule to drop all other requests for port 53 lookups, forcing your Pi-Hole to be DNS king of the mountain. This stops devices and apps from violating your settings
Done!
Huge thanks to the Pi-Hole community, especially Digninc and Tony Lawrence. His excellent write ups got me 90% there, and his solution is better than mine because of the limitations described above, but in the end I went back to basics because of one thing- Tony’s solution was brilliant, but using a Docker-Compose.yml file on Synology currently requires that you start and stop your Dockers with SSH, and that’s a step I wouldn’t want to require of my clients if I was setting it up for them, so it became the turn around point.
[/et_pb_text][et_pb_text _builder_version=”3.27.4″]
You know what? That’s basically it. Huge props to developers and especially Diginc who essentially put a bunch of logic in to figure out if Pi-Hole was running in Docker and adjusted itself to suit. Looking at the logs there still appears to be a bug – I have both Google DNS servers blocked at the border of my network (for geo-dodging), and even when I add the correct servers to the ‘Environment’ settings in Docker, the logs say-
Docker DNS variables not used |
Existing DNS servers used (8.8.8.8 & 8.8.4.4) |
[/et_pb_text][/et_pb_column][/et_pb_row][et_pb_row _builder_version=”3.25″][et_pb_column type=”4_4″ _builder_version=”3.25″ custom_padding=”|||” custom_padding__hover=”|||”][/et_pb_column][/et_pb_row][/et_pb_section][et_pb_section fb_built=”1″ _builder_version=”3.22″][/et_pb_section]


