Background
This is my notes from a couple of installs. I have been using this method with some success since early days- I still don’t know why it seems to be so difficult, but perhaps one day the docs will catch up with the furious pace of progress…
Requirements
This article assumes that you have a Synology NAS capable of running some serious apps, and you have some familiarity with Synology DSM 7.2 and the new-ish Container Manager. We will use File Station (built in) and Download Station. You can install these now or use a different method to get the files (like ‘curl’), it doesn’t really matter.
Let’s Begin!
Log in to DSM and open ‘File Station‘. here we’ll create a directory structure because this makes it easier to launch a new version when it arrives without having to mess with the older files, so you have a back out option if something goes wrong…
Create directory Structure
Create a Folder/ Directory for your experiments, mine is called ‘docker’.
( We will use the terms ‘Folder’ and ‘Directory’ interchangeably in this article)
Inside ‘docker’, make another directory for ‘superagi’ -yes we’re using all lower case to make the paths easier. Until they aren’t, about 3 seconds later…
Current version is v0.0.12 at time of writing, so we’ll make another directory in here called ‘SuperAGI-0.0.12-files’ or similar.
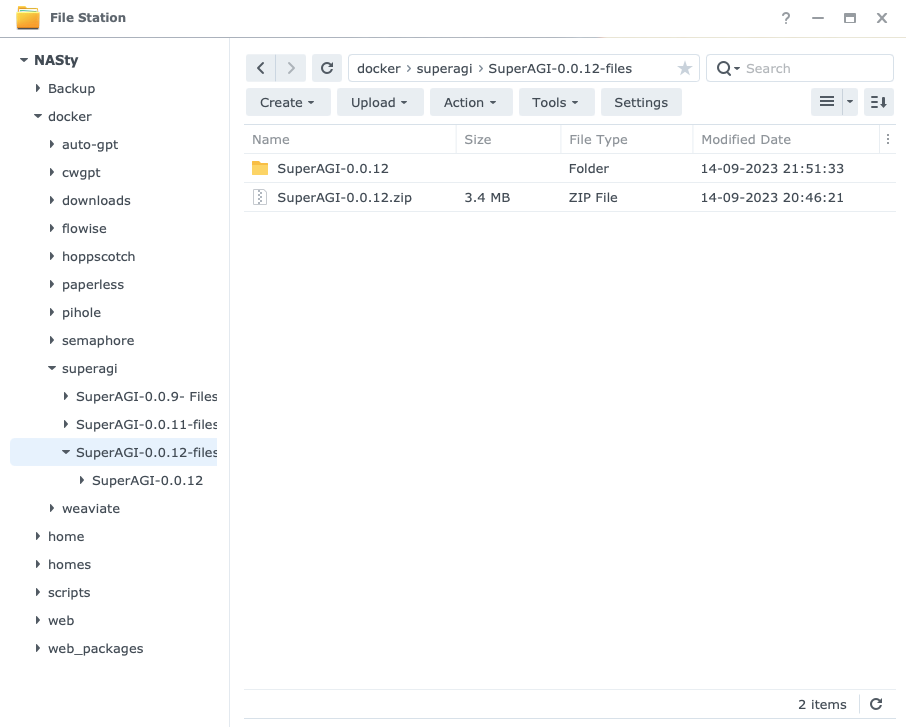
Download the Files
Open the Synology package ‘Download Station‘ and paste ‘https://github.com/TransformerOptimus/SuperAGI.git‘ – you’ll be asked where to download to, choose eg. ‘Volume1/docker/superagi/SuperAGI-0.0.12-files’
(Your volume name might be different, you can get the path by going to the folder, right click and select ‘Properties’. the path is in the resulting window under ‘Location’
Extract the Project
Once done, navigate to that folder and right-click on the .zip and select ‘extract here’
Rename the Config Template
Hold up! The published instructions might not be the correct method any longer- you can DEFINITELY add the OpenAI key in the GUI once running- but it’s uncertain if it still works when hardcoded into your .YAML file- So we will add the key later.
(See here for details)
Change the name of your file from ‘config_template.yaml‘ to ‘config.yaml‘ (
To do this-
1. Right-click ‘config_template.yaml‘ and select ‘duplicate’
2. Then select the copy and right-click and select ‘rename’.
Create a new Container Manager Project
Now open Container Manager and select ‘Create’. Set your project name ‘superagi0012’ (cannot use capital letters here for some reason), set the path to be the folder full of extracted files you just unzipped.
At this point Container Manager will detect the docker-compose.yaml file in that folder and offer to use it- say yes!
Build the Project
Click the build button and wait… and wait. Even on a Xeon powered Synology with 64GB RAM this build process takes a while.
Eventually the project will finish building and you can log on using your Synology’s local IP-
SynologyIP:3000
eg. 192.168.1.100:3000
It might say ‘initialising’ for a while, but the interface will appear eventually- and now you’re ready to take over the world!
It’s a beautiful thing…