So I hope you haven’t bothered to read my 2000 word epic about this that I’ve been working on for weeks. It’s essentially a very long laundry list of things that don’t work. After getting VMWare involved I did think however that we might both figure it out, or at least get some pointers. This was until today, when they said ‘oh no, you can’t do that….’
To which I replied ‘yes you can, several people have done it. I just want you to tell me what the easiest or recommended way is….’
‘well, we don’t support any other method than installing a clean system. We don’t support making a physical Mac into a VM’
Riiiiight, so you support migrating LIVE instances of Windows and Linux, but won’t even admit that Macs existed before VMWare. I think you’re scared dude.
Being a lazy man (OK I prefer to be described as ‘time efficient’) I figured it out and the recipe is here below. If you want to get a sneak peek at the very boring and obvious answer, click here. But don’t tell the others….. I hope you feel dirty for cheating.
I owe a huge debt here to Rich Trouton who so nicely documented much of this stuff. Also to FortySomethingGeek who wrote a method up- unfortunately it doesn’t seem to work any more.
1. Make a clean operating system
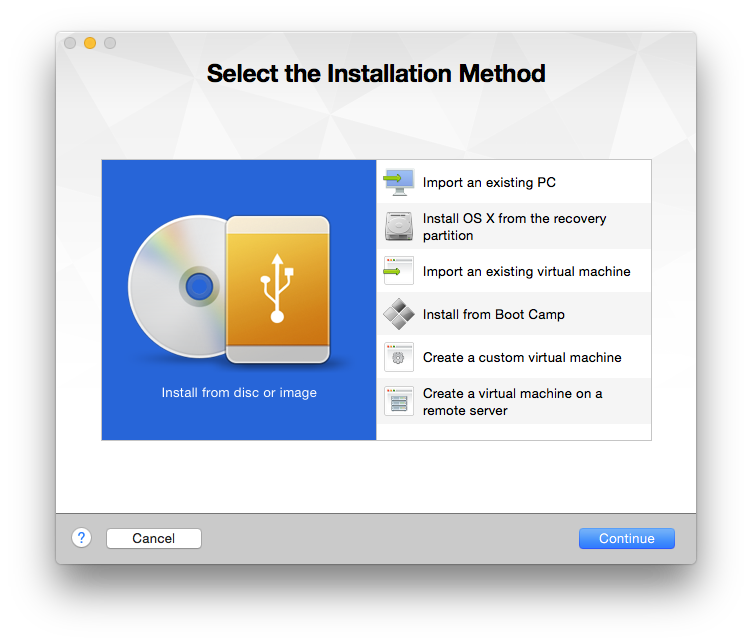
Using Fusion v8.02 select New and ‘Install from Disc or Image’
Click Continue and then drag the install media into the next window- notice here how I have extracted the InstallESD.dmg out of the installer bundle from Yosemite. This isn’t necessary, just use the Installer from the App Store- yeah, not the one I have highlighted.
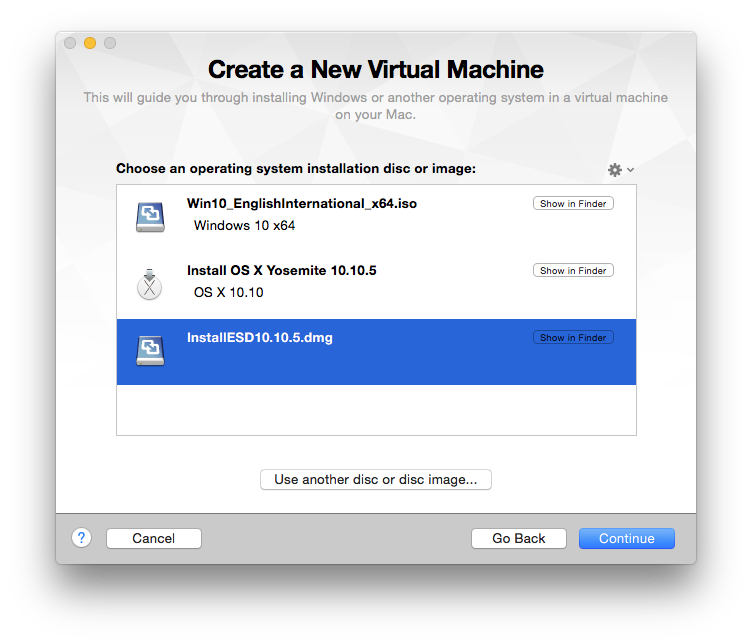
Click Continue. This will set up a standard Guest OS with 40GB of drive space and 2GB of RAM. You can change these settings or leave it to change later. Click Finish or adjust the settings.
This will then go about the standard process of writing the install files to the blank virtual drive and then will reboot to complete the installation. Then it will reboot to ask you to complete the setup, create an account etc. but at this point you can just shut it down.
You can see in this screen shot I’ve called the VM ‘The Importer’ because I’m so crazy original.
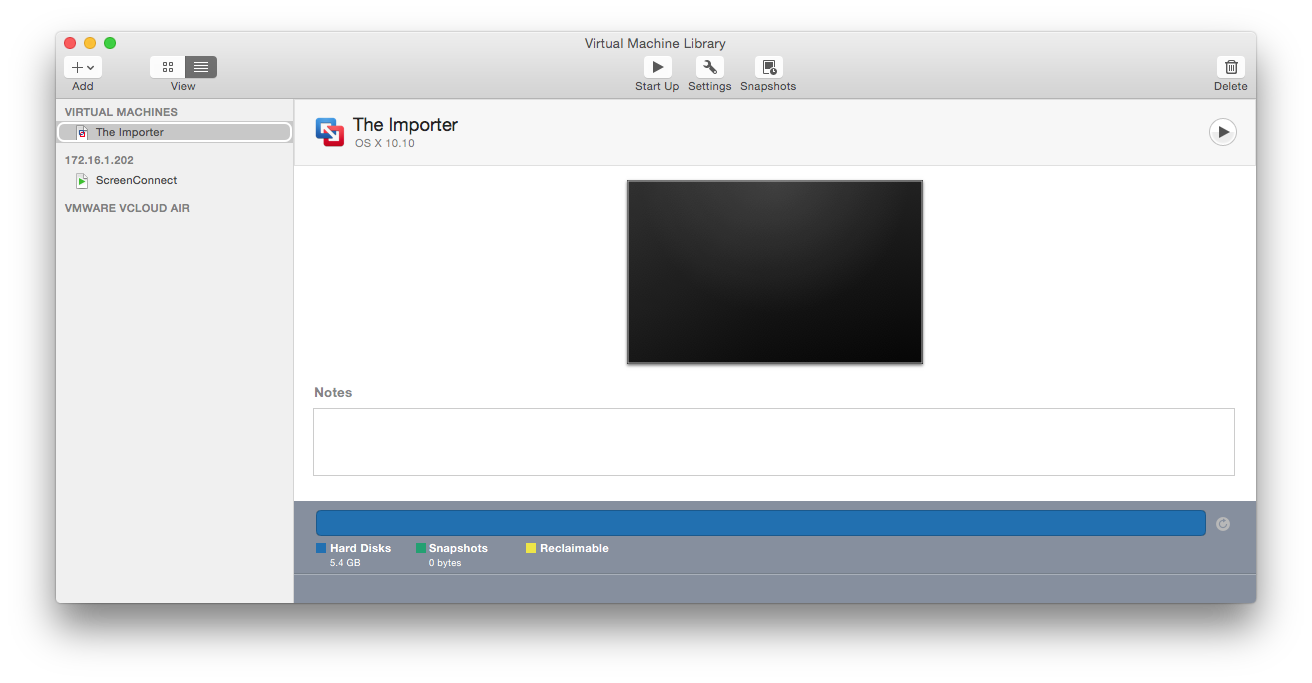
But you can’t upload that VM just yet- click on the machine, click on ‘Settings’ and then ‘Compatibility’ and change it from Version 12 down to Version 11, as Version 12 is not currently supported on ESXi 6.0.0 then click ‘Apply’
If you right-click on that VM you will get the option to ‘Upload to Server…’
Let’s do that….
I got bored here and didn’t describe the entire process of transferring the VM file. It’s easy, ok?
Once transferred, you should rename the file to the purpose it will be used for. This one will be used for Open Directory service, Munki testing and a couple of other minor things, so I’ll give it the terribly exciting name ‘Server’.
It will appear in your Virtual Machine library on your ESXi host, but have a look at the description- it says ‘other (32-bit)’ which needs to be fixed as it’s not 32 bit at all. Click on Settings, then General, and click next to ‘OS’ – (it doesn’t look like a clickable element, but it is). Change it to ‘Apple Mac OS X 10.10 (64-bit)’ and accept the change when closing the Settings window.
Test that it boots- yep, we’re winning like Charlie Sheen.
Now go to your physical or ‘Donor’ machine. Take down the network settings as these will be changed by the migration.
And this leads me into the reason for me spending weeks on this and not getting anywhere. I’m not a fan of using Migration Assistant to import accounts etc from one machine to another if it’s a server. Yes, I’ve used it plenty of times for client computers, but I like the OS to be quiescent when pulling a server across. Bah, maybe I’m just old fashioned. Where’s my slippers?
So let’s do the next best thing apart from a block copy. Go to your Donor machine and fire up Migration Assistant. Follow the prompts on both machines (you’ve done this before right? I’ve probably done it hundreds of times…… This will move across all of your data, and when done you can test it. Does it boot? Yes! Oh wait, MySQL won’t start. So it turns out my reluctance to use Migration Assistant wasn’t just the ravings of an old loony, when it brought across the /usr/local folder it did not set the perms the way that MySQL wanted and it spat the dummy. I’m embarrassed to tell you how long it took me to figure this out, but let’s just say if I was making my hourly rate on this job I’d be very poor. Because I pay me.
When you’ve got the VM running the way you want you can shut it down, right click and select ‘upload to server’. Again, I won’t describe that bit because it works as it should.
Now here’s where things got a bit interesting. I’d basically conquered the job and should have been celebrating, but I realised that I wanted all of the ESXi hosts to be the same config, which meant that I needed to move a couple of VM’s from one host to another so I could install new SSD’s. In this age of drag and drop that should be easy? Well, if it were easy I wouldn’t have a job.
VMWare are very generous in giving you a free license for ESXi that you can install on up to 100 hosts. BUT- you can’t use the VMware web client to manage them, you can’t use Fusion to drag and drop VM’s between hosts and the Windows vSphere Client only allows you to connect to one ESXi host at a time. You can get an eval version of vSphere Server to do this, but I prefer to not use tools that will self destruct, and this one could be a $5k load on your finances if you really need it one day.
The solution then is to drag the VM back to your copy of Fusion, test, then upload to the correct ESXi host. Except that doesn’t work. While VMware has fixed the upload of VM’s from Fusion to ESXi to include the smc.present = “TRUE” flag, the reverse is not true. So when you pull it back off the ESXi host to Fusion it won’t boot until you fire up that text editor and add the flag back in to the .vmx prefs file. This is covered nicely here about 3/4 of the way down in the article. I also found that when I had modified the .vmx file and saved it back, the option to ‘upload to server’ was greyed out. Oh great, what had I broken now? Turns out that I needed to go into Settings and change stuff and then save to get the .vmx prefs file ‘refreshed’. I can only speculate that it’s because I used TextEdit to edit the files. Yes, I know- should have used Text Wrangler or other markup aware editor.
So here we go. To virtualise a physical Mac
- Use Fusion to create a freshly booted Mac image from the installer file
- Use Migration Assistant to pull the accounts and settings across to the new virtual Mac
- Change the Hardware compatibility, RAM and other settings as desired
- ‘Upload to server’ for your new Mac VM
- Change OS type in Settings
- Boot VM, Check network, backup settings etc. Change computer name
- Profit
To move a Mac VM between ESXi hosts without spending megabucks-
- Download it back to Fusion
- Upload it to the new host
- Use Cyberduck to modify the .vmx prefs file and add back the smc.present = “TRUE” flag
- Buy Adam a beer
Or here’s a second method-
- Upload your clean ‘importer’ VM to the new ESXi host
- Boot the donor VM on the other ESXi host
- Use Migration Assistant to shuffle the data over. This won’t require you to use Cyberduck
- Yeah, I can probably buy my own beer
*The reason I found out about this last method is because I tried several times to move one of my servers across and it had weird issues, definitely connected to the .vmx file that I had edited. Rather than figure out what had gone wrong I simply did the import this way. Well, because it’s already 7:30pm on Sunday night…….
OK here’s another method- importing the data from a Time Machine backup over the network. It turns out that you can’t really import data via any direct attach method- this is what I was trying to do and it made me quite crazy. And never worked.
- transfer ‘The Importer’ to your ESXi host
- Boot the VM and tell it you want to import from a ‘Mac or Time machine Backup’
- When the system is looking for the disk, click ‘Other server’ (possible this is only applicable to Non Apple TM shares, mine is a Synology NAS)
- Put in username and password touches the share
- It will find the Time Machine backup and say ‘Loading backup’ forever, so
- Click ‘Back’ and when you go back to the last screen, you have a second source called ‘Time Machine Backups’
- Click on that, then ‘Continue’ and you’ll get back to a screen with the backup ready to import. There is an issue with reporting the correct ‘last backup’ time though, looks like it is displaying GMT?
I hope this helps a few people because honestly that information was hard won. Some parts of Fusion and the VMware universe are great and operate just like they should, but other bits lead me to have keyboard imprints on my forehead.