This information was not developed by me- thanks to Wayne Driver and Ben Smith for this info. I’ve added the ‘remote server’ section at the bottom
The following was done with phone system on LAN, settings will differ if your phone system is on WAN.
- Drag and drop this FXS template to somewhere on your Desktop, supplied from GrandStream support (You need to contact them). They did ask I not share it on any forums, not sure why.
- Copy the FXS template to the template location on the 3CX Controller.
Windows:
C:\ProgramData\3cx\Instance1\Data\Http\Templates\fxs
Linux:
/var/lib/3cxpbx/Instance1/Data/Http/Templates/fxs/
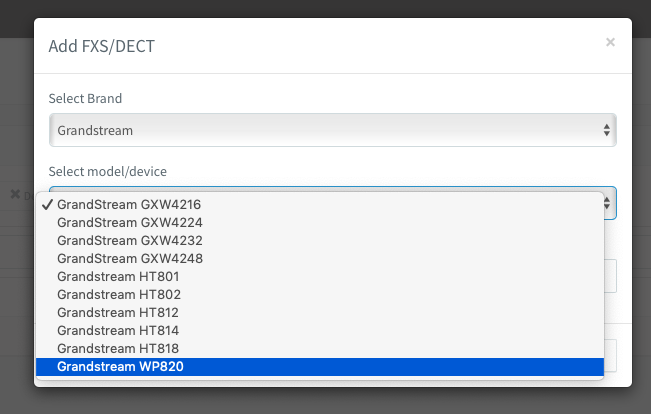
- Then in 3CX Management page you will find the template in Advanced->FXS/DECT
- Join the phone to your wireless network from the phone itself.
- Get the IP from the phone. (Can find in ‘Settings’ on the phone, or from your DHCP server)
- In a command prompt ping the IP from your PC then type arp -a and get the MAC that corresponds to the IP.
- Then go back into 3CX Management page and add it as a DECT Device, and assign it to an Extension.
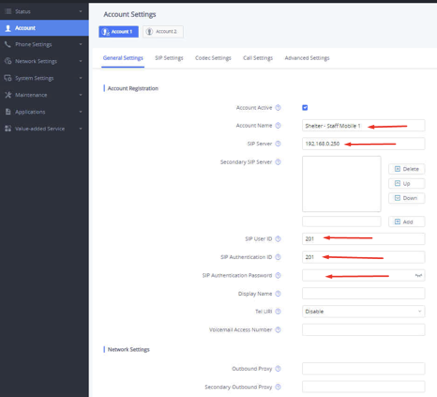
- Logon to the WP820 webpage.
- In the Account settings under SIP Server just put the 3CX Controllers IP address, not the whole provisioning URL.
- Then fill in the:
Account Name: {whatever you like}
SIP Server: IP address only. Found in 3cx > Advanced > FXS/DECT > {Then part of the provisioning link}
SIP User ID: This is the extension number
SIP Authentication ID & Password: Found in 3cx > Extensions > {Choose extension} > General Tab > Authentication
- Click Save at the Bottom then Apply at the top.
If Using a Remote Server-
- Use the full FQDN of your 3CX install- including port number
- SIP UserID is your extension number
- SIP Authentication ID & Password: Found in 3cx > Extensions > {Choose extension} > General Tab > Authentication