
We all use email extensively, but we tend to forget the fact that it isn’t encrypted by default…..The best analogy is to think of an email like a postcard- yes, anyone involved between sending and delivery can read it- it’s plain text and unprotected- and they can modify it and you won’t know! One thing you can easily do is add a certificate to your email client to give some protection- your email will still be sent unencrypted, but it’s more like sending a letter in an envelope – it can still be read, but you’ll know if it’s been tampered with. But the big advantage here is that the certificate guarantees the sender- email is very easy to spoof (fake) so this is an important consideration.
The process isn’t all that complicated, so let’s have a go!
1. Getting your free personal email certificate. There are a couple of suppliers for this (see here) however I’ve chosen Comodo because they have been around for a long time. First, go to their page
http://www.instantssl.com/ssl-certificate-products/free-email-certificate.html
and click on the Orange button that says ‘Free Email Certificate. Get Now!’ then fill in your details on the next page. Click the ‘accept terms’ checkbox and then the ‘Next’ button. You will be sent an email containing a link to your certificate. Here’s where the instructions differ a little between Mac and Windows.
2. Installing your certificate. When you click on the link in the email, it will download a file called ‘CollectCCC.p7s’ into your downloads folder. From here you should go into your Applications/Utilities’ folder and open ‘Keychain Access’. In Keychain Access, go to the File menu and select ‘Import Items’ then navigate to your downloaded certificate. Import it and it will now appear in your ‘My Certificates’ category with your email address as its name. Double click it in Keychain Access and make sure the trust settings for ‘When using this certificate’ are set to ‘Use system defaults’ or ‘Always trust’. Quit Mail, then re open it and create a new blank email. You should see 2 new graphics appear in your blank email window next to your signature settings. One is to Encrypt mail (we’ll discuss this later) and the other will turn digital signing on or off for each email.
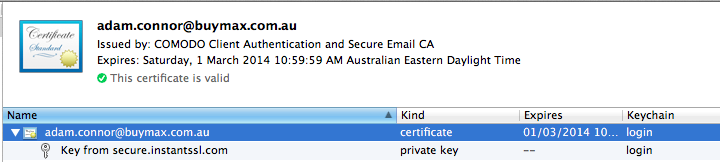
This is how your certificate looks when viewed in Keychain Access
3. Installing on your iPhone or iPad. That certificate is for your email address, not a device, so let’s install it on your other iToys. Go back to Keychain Access and find your certificate again. Right click on it and select ‘Export’. Make sure the format is ‘Personal Information Exchange (p12)’ and click ‘Save’. You will be asked to specify a password for the file, do it. Find this exported file and email it to yourself. Go to your IOS device and open Mail, check your messages and tap on the name of your certificate, in my case it is named ‘certificates.p12’. This will prompt you to install, so tap the ‘Install’ button. You might get a warning about it being an Unsigned Profile, but install anyway. You will be asked to supply the password from when you saved it out in the correct format. Enter that and you are done.
Now- here’s an interesting thing- if you check Settings/General/Profile you might see this profile listed as ‘Not Trusted’. But if you go to Settings/Mail, Contacts, Calendars/ Your email address/ Advanced/ S/MIME/ Sign and click on the certificate you just installed, it shows as ‘Trusted’. I have no idea why this might be- maybe the method of installation?
One last thing- you remember we haven’t discussed how to encrypt email? That’s because if you simply sent an encrypted email to someone, they wouldn’t be able to read it without the key. And this requires trust between you and the receiver. To enable encryption you have to complete the circle of trust, i.e.. BOTH parties need to be signing their emails! So, to have non modifiable, unreadable and secure communications between two parties, it requires both of them to go through this process, and you need to have the other parties certificate in your Address Book. On IOS this requires you to click on the name of the person with the certificate and add it manually, in Mac OS X, Mail will automatically extract the certificates and add them to the contact’s details.
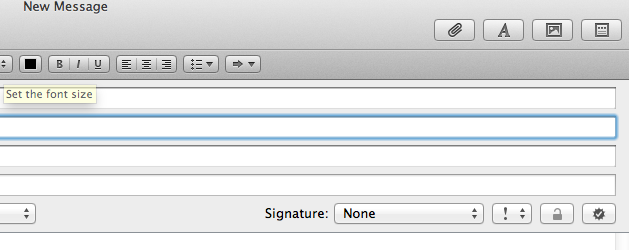
A signed, but unencrypted email
When your certificate is properly installed, you’ll see this star shape with a tick inside (bottom right). To turn off digital signing, just click the button and the tick will go away. Also notice the greyed out open padlock symbol next to it? This is either because you don’t have a certificate for one or more of your recipients, or you haven’t entered anything in the ‘To:’ field.
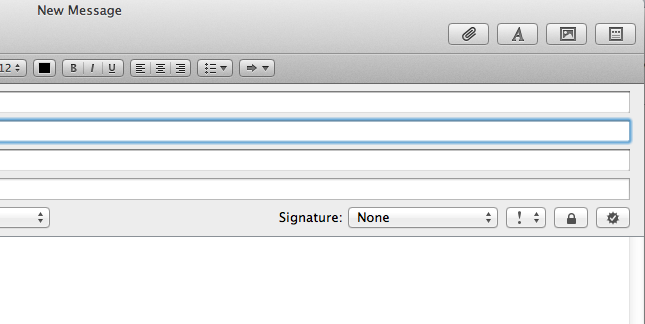
A signed and encrypted email
Here you can see a black, locked padlock. This means the email will not only be signed, it will also be encrypted, because your system has the certificate for the recipient. Again, you can turn this off by clicking the padlock button and the icon will change to the unlocked version, but black rather than greyed out.
With thanks to these articles for much of the information-
http://arstechnica.com/apple/2011/10/secure-your-e-mail-under-mac-os-x-and-ios-5-with-smime/
http://feinstruktur.com/blog/2011/12/12/using-smime-on-ios-devices.html
